3D Print Notebook
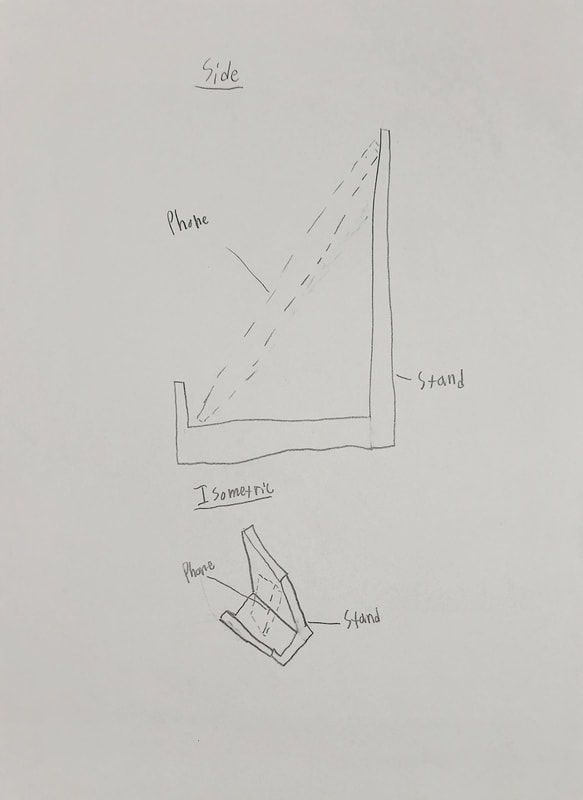
While first thinking of the project I decided to make a phone holder. The toothbrush at home already has its own stand, but being able to watch my phone without holding it would be much more comfortable. First I imagined a simple L design but it with the phone on it, it could possibly tip over so I thought of a solution.
Pre-Work
|
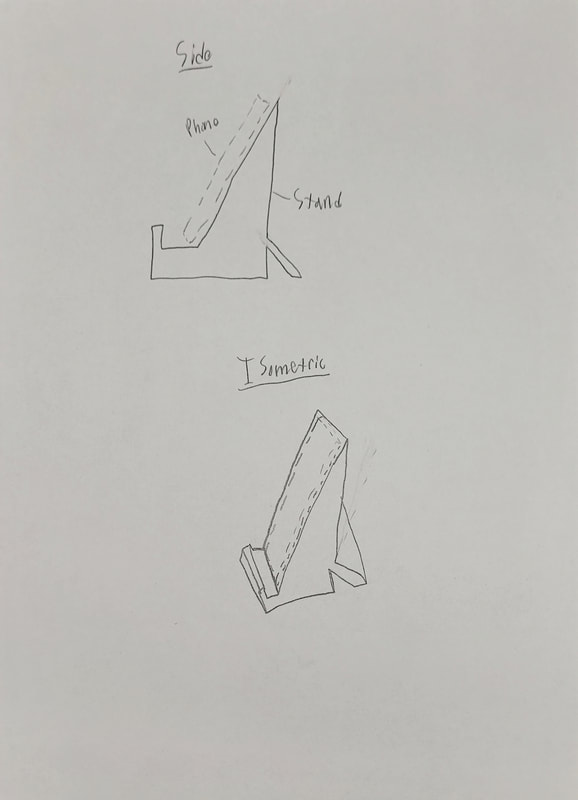
To the left is the first design to hold the phone. Once in inventor I decided that it could fall over while holding the phone so I went back to drawing. To the right is the second design with a support on the back to give more stability.
|
|

This is my phone that had to be held. It had to be large enough to support this or the phone holder would be pointless.
Order of Creation (Recipe)

|
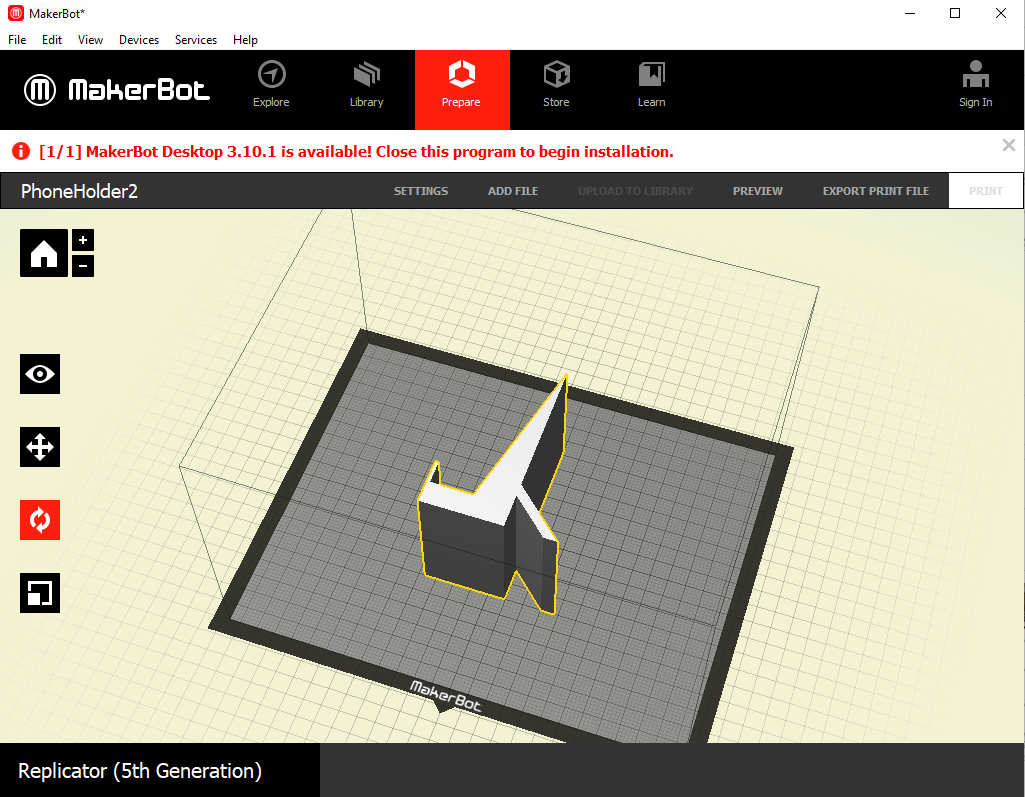
Here is my sketch after the support was added. I then extruded it 3 in. It is now ready to be uploaded to my google drive (to back it up) and to MakerBot to be set up for printing.
|
|
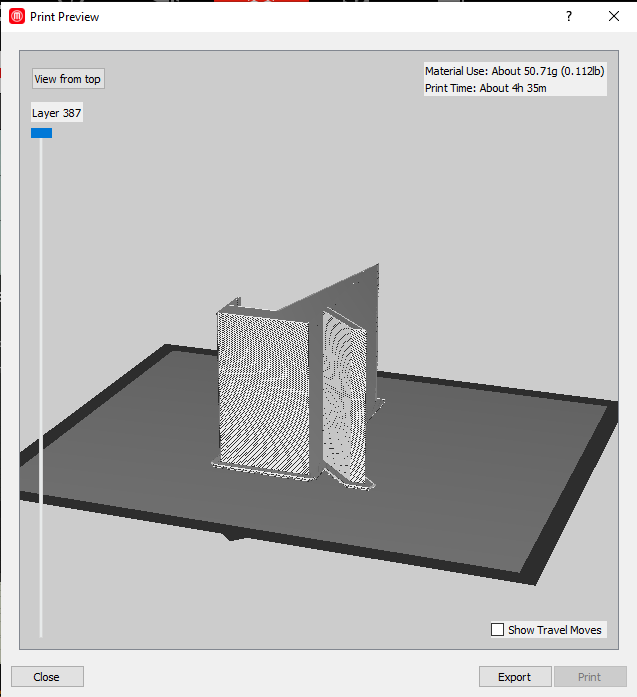
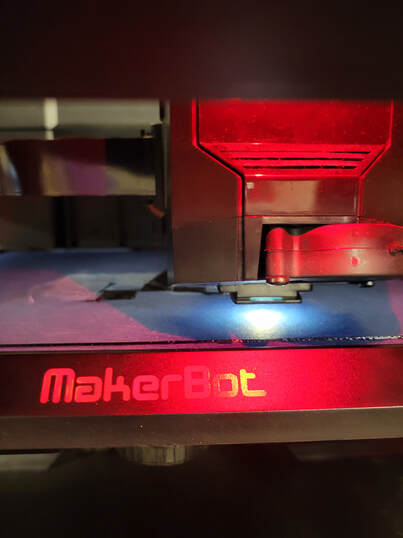
Here is my print in MakerBot. I have set the settings to Smart Extruder+ and no supports because they are not needed for this print. From here I will upload the MakerBot file to my flash drive and google drive. On the far right is my print preview showing all layers and the time it will take to print.
|
|
|
|
This is my print in the printer. It is currently finishing the raft for the print to go on (I started printing towards the end of class so it was only in the first part of printing).
|
|
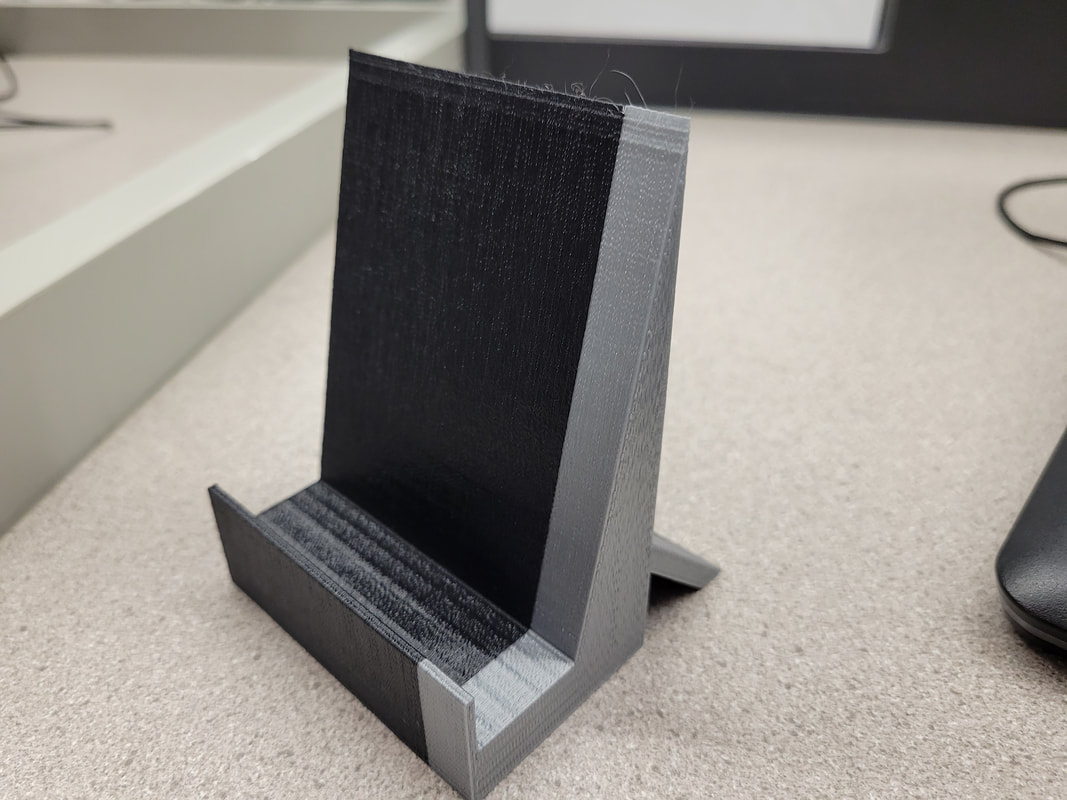
This is my finished print. Since it was a larger print it ran out of filament (next time I will look to make sure there is more) so part of it ended up grey. I think the grey stripe actually adds some depth to the print! No supports were necessary because it was printed on its side.
|
|
|
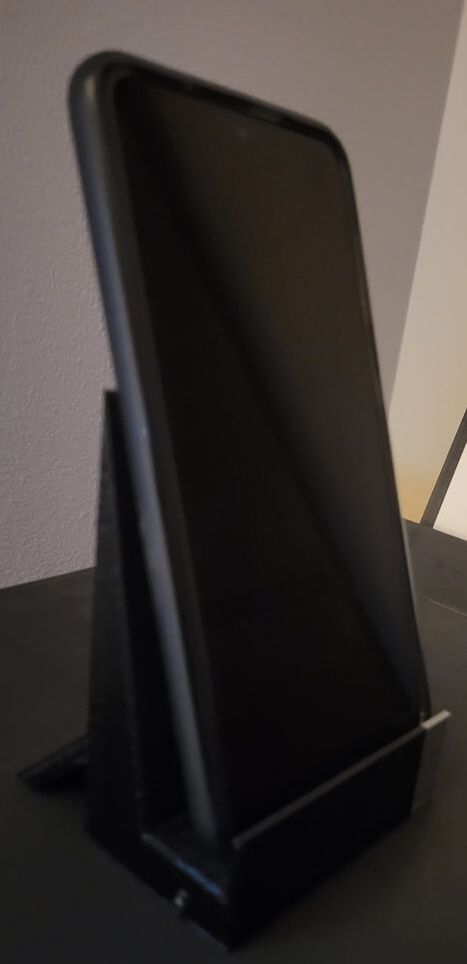
Here is the phone holder holding the correct phone. It does not tip over and it works with the phone vertical and horizontal.
|
What I Learned
Over the process of the 3D-printed phone holder I learned many things, including when to use supports, changing a design, and reloading filament. I learned I didn't need supports on my print because none of it is "mid-air". I learned how to go back and change my design in inventor by accessing the first sketch. Then I learned to reload filament because it was disconnected, I had to use the printer's screen to choose unload and then reload it.
